

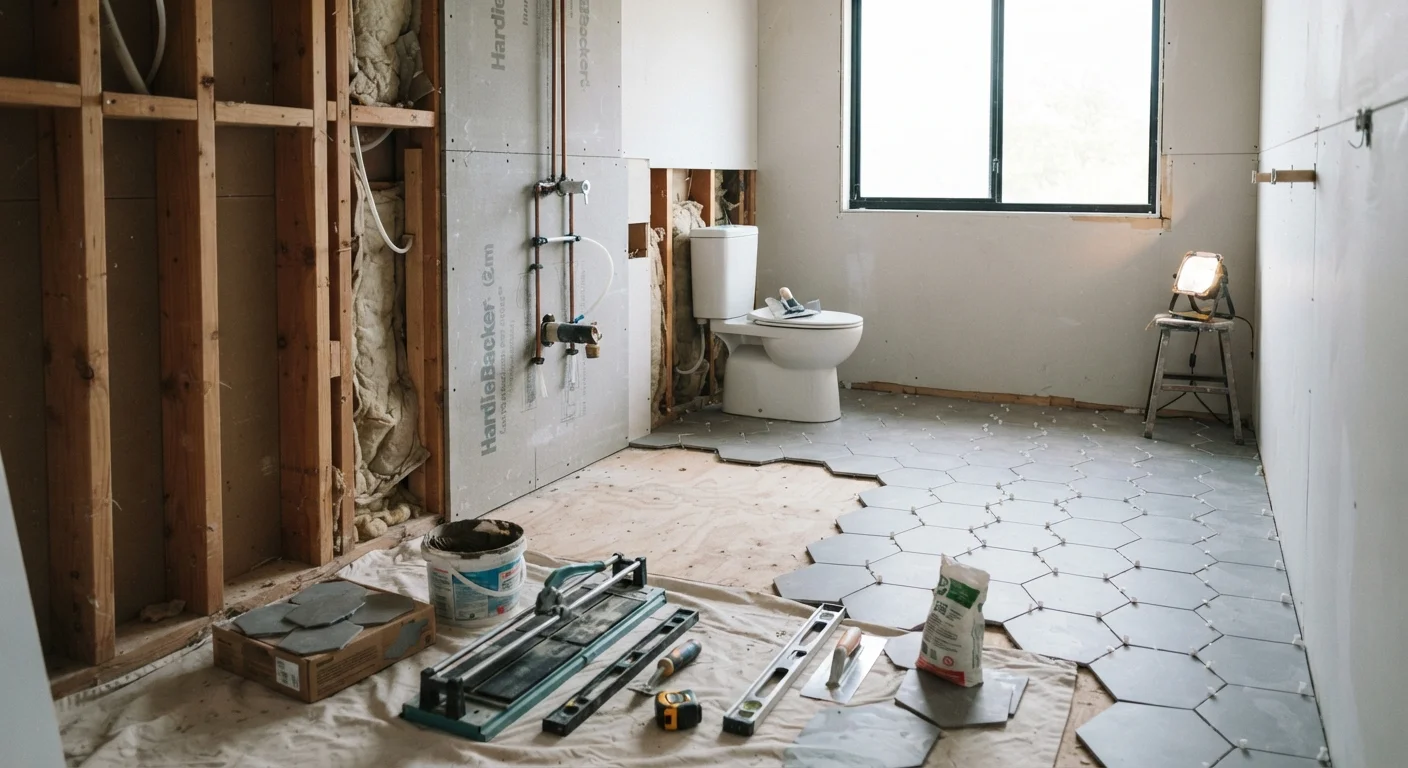
Key Takeaways
- Rough plumbing and electrical work must be inspected before walls are closed up.
- Waterproofing the shower surround is non-negotiable - skipping it causes hidden structural damage.
- Tile goes in after rough work is approved, not before - reversing this order is costly.
- Ventilation fan placement affects both code compliance and long-term moisture control.
- Most bathroom renovations involve at least two licensed trades; plan their schedules in advance.
Why Sequence Matters More Than You Think
A bathroom renovation is one of the most trade-dense projects a homeowner can undertake. Plumbers, electricians, tile setters, and finish carpenters often need the same walls - and the order in which they work determines whether the project flows smoothly or spirals into expensive rework.
Getting the sequence wrong is the most common reason bathroom projects run over budget. Installing tile before a plumber has confirmed drain placement, for example, means breaking that tile later. Closing up walls before an electrical inspection means opening them again. Understanding the correct order - even if you're hiring every trade - gives you the ability to schedule intelligently and ask the right questions.
See our guide to deciding which projects belong to contractors if you're still working out which tasks to take on yourself.
Planning and Permits Before Anyone Lifts a Hammer
Start with a scaled drawing of the existing bathroom - noting drain locations, window positions, and door swing. Any change to plumbing drain lines or electrical circuits typically requires a permit in most U.S. jurisdictions. Cosmetic work (replacing a vanity or swapping fixtures at existing locations) often does not, but confirm with your local building department before assuming.
Permits exist to trigger inspections, which protect you. An uninspected rough-in that's later discovered during a home sale can delay or derail closing. Pull permits for any work that warrants them - it's a straightforward process and worth the cost.
Drain Relocation Requires a Permit
When relocating a toilet or tub, your plumber must confirm that the drain slope meets local code - typically a minimum of 1/4 inch of drop per foot of run. Changes to drain location almost always require a permit and inspection before the floor is closed. Skipping this step can result in failed inspections, mandatory demolition of finished work, and complications when selling your home.
When relocating a toilet or tub, your plumber must confirm that the drain slope meets local code - typically a minimum of 1/4 inch of drop per foot of run. Changes to drain location almost always require a permit and inspection before the floor is closed.
Demolition: What to Remove and in What Order
Demolition has its own logic. Start by shutting off water supply lines and the relevant electrical circuit at the breaker. Remove accessories and light fixtures first, then the vanity and toilet (cap the drain immediately to block sewer gases). The tub or shower surround comes next.
When removing tile from walls, work carefully around existing plumbing stubouts - damaging a supply line inside the wall escalates the job significantly. Pry cement backer board away in sections rather than swinging a hammer blindly; pipes and wiring often run closer to the surface than expected.
Test for Hazardous Materials Before Demolition
Homes built before 1980 may have asbestos-containing floor tile, joint compound, or pipe insulation. If you suspect hazardous materials, stop demolition and arrange for professional testing before continuing. Disturbing asbestos without proper precautions is a serious health hazard and may violate federal and state law. Contact your local health department for guidance on certified testing services.
Homes built before 1980 may have asbestos-containing floor tile, joint compound, or pipe insulation. If you suspect hazardous materials, stop demolition and arrange for professional testing before continuing. Disturbing asbestos without proper precautions is a serious health hazard and may violate federal and state law.
Once surfaces are stripped to studs and subfloor, assess what's underneath. Soft or spongy subfloor around the tub or toilet base signals moisture damage that must be repaired before anything new goes in - see our guide on grout, caulk, and tile maintenance to understand how water infiltration typically begins.
Rough Work: Plumbing, Electrical, and Ventilation
With the bathroom stripped, rough work begins. This phase - plumbing supply and drain relocation, new wiring, and ventilation ducting - must be completed and inspected before any walls are closed or tile is set. Schedule your plumber and electrician to coordinate; they often need access to the same wall cavities.
Plumbing Rough-In
New supply lines are typically copper or PEX (cross-linked polyethylene), a flexible plastic tubing that's easier to route in tight spaces. Confirm the rough-in dimensions of your new fixtures before the plumber sets stubout heights - a toilet rough-in (distance from the wall to the center of the drain) is most commonly 12 inches, but 10- and 14-inch versions exist.
Electrical and Ventilation
Bathrooms require GFCI (ground fault circuit interrupter) protection on all receptacles, and most codes require at least one dedicated circuit for the bathroom. Ventilation fans must vent to the exterior - never into an attic or wall cavity - and the duct size must match the fan's CFM (cubic feet per minute) rating. An undersized duct chokes airflow and allows moisture to accumulate.
Order fixtures before demolition begins. Rough-in dimensions on a new toilet or freestanding tub can differ from what's currently installed, and your plumber needs those measurements before setting drain stubouts.
Mismatched rough-in dimensions are one of the most common mid-project surprises - discovering them after plumbing is set can require cutting and re-routing drain lines at significant cost.
Run a second dedicated circuit to the bathroom even if code doesn't require it. Hair dryers, space heaters, and electric shavers running simultaneously on a single 15-amp circuit is a recipe for tripped breakers.
Modern bathrooms carry a much higher electrical load than older homes were designed for; building in capacity now avoids nuisance issues and potential hazards down the road.
Tile, Backer Board, and Waterproofing
Once rough work passes inspection, the substrate goes in. Regular drywall is not suitable for wet areas - cement backer board or a foam waterproof panel system is required behind shower and tub tile. In the shower, a waterproof membrane (either a liquid-applied product or a sheet membrane) should be applied over the backer board before any tile is set. This is the layer that actually keeps water out of the wall assembly.
Floor tile goes in before wall tile. Set the floor first, allow it to cure, then work up the walls. This sequence simplifies the installation and gives you a clean reference line. For grout joint sizing and layout planning, the same principles covered in our kitchen backsplash tiling guide apply to bathroom wall tile.
Use a polymer-modified thinset mortar rated for wet areas. Large-format tiles (anything over 15 inches on a side) require back-buttering - applying thinset to the tile back as well as the substrate - to prevent hollow spots that can crack under foot traffic or thermal movement.
Fixtures, Finishing, and Final Inspections
Finish work follows tile in this order: install the toilet, then the vanity and sink, then the shower fixtures, and finally trim and accessories. Connecting supply lines and setting the toilet wax ring is straightforward, but don't overtighten closet bolts - porcelain cracks under excess torque.
Caulk (not grout) belongs at all changes of plane: where the tub meets the floor, where the wall tile meets the tub deck, and around the toilet base. Grout is rigid and cracks at these joints; silicone caulk flexes with normal movement. Use a mildew-resistant formulation in any wet zone.
Before the project is considered complete, schedule any required final inspections. The inspector will confirm that GFCI protection is in place, the fan vents properly, and plumbing connections don't leak. Keep copies of all permits and inspection records - they document the work was done to code, which matters for insurance claims and future home sales.
This article provides general home improvement guidance and is not a substitute for advice from licensed professionals. Always verify permit requirements and code compliance with your local building authority before beginning renovation work.