

Key Takeaways
- Composting converts kitchen and yard waste into a free, nutrient-rich soil amendment.
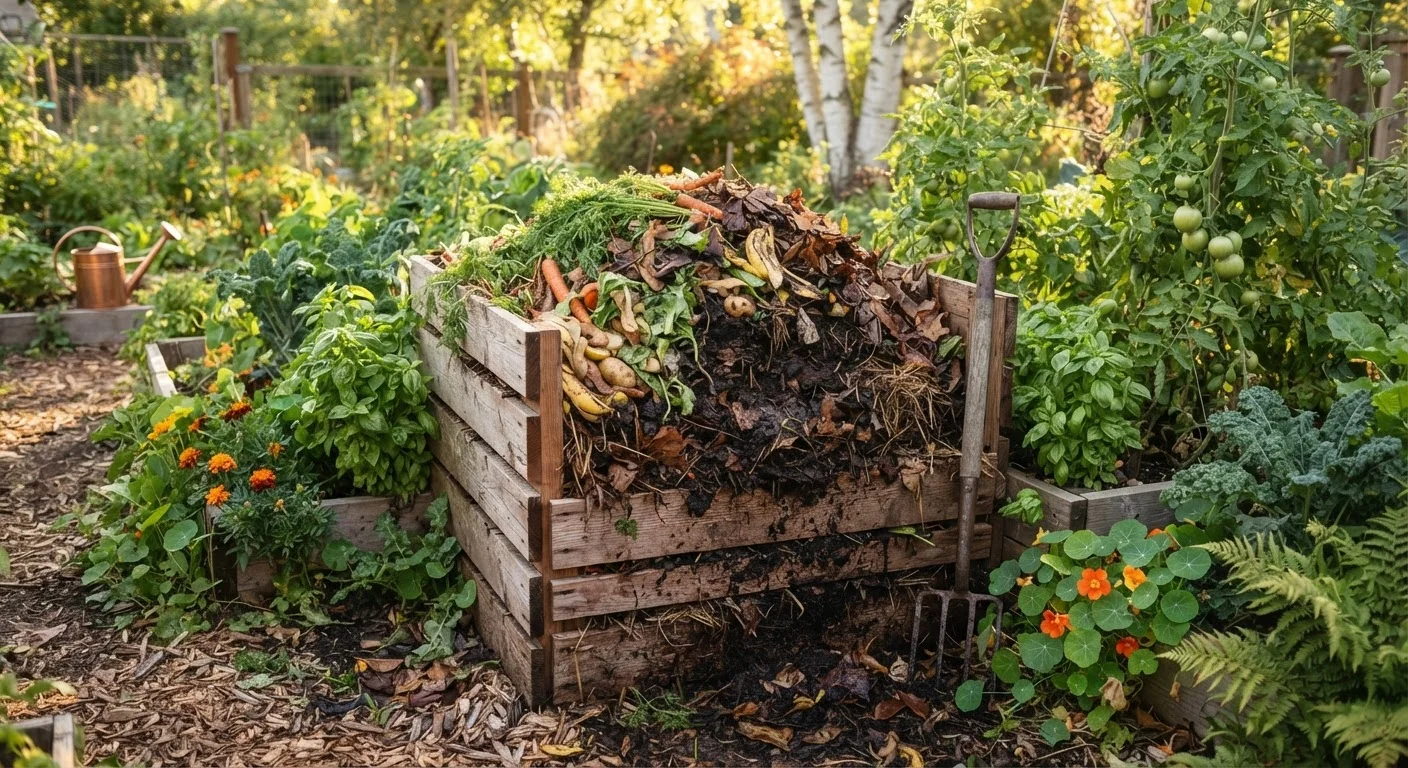
- A healthy compost pile needs a balance of carbon-rich "browns" and nitrogen-rich "greens."
- Meat, dairy, and oily foods should stay out of a standard home compost pile.
- Finished compost smells earthy, looks dark and crumbly, and shows no recognizable scraps.
- Compost can be worked into garden beds, used as mulch, or mixed into potting soil.
Start here
Why Composting Is Worth Starting Today
Next
Choosing Your Composting Method
Build your knowledge
What to Add - and What to Avoid
Get hands-on
Maintaining Your Compost Pile
Check your progress
How to Know When Compost Is Ready
Put it to use
Putting Finished Compost to Work
Why Composting Is Worth Starting Today
Composting is the process of allowing organic materials - fruit peels, coffee grounds, dead leaves, grass clippings - to break down into a dark, crumbly material called humus. That finished product improves soil structure, feeds beneficial microorganisms, and reduces your household's contribution to the landfill, all at once.
Home gardeners who regularly apply compost often find it easier to grow healthy plants because compost helps sandy soils hold moisture and loosens heavy clay soils so roots can spread. If you are planning a productive vegetable plot, check out our guide on growing vegetables through every season to see exactly where finished compost fits into the planting calendar.
Humus
The stable, dark, organic matter that remains after compost fully breaks down. It improves soil texture and slowly releases nutrients to plants.
Browns
Carbon-rich materials such as dried leaves, cardboard, and straw. Browns provide the energy source for decomposing microorganisms and keep the pile from getting soggy.
Greens
Nitrogen-rich materials such as vegetable scraps, coffee grounds, and fresh grass clippings. Greens supply the nutrients that fuel microbial activity in the pile.
Hot composting
An active composting method that involves turning the pile frequently and maintaining moisture so the interior reaches temperatures high enough to speed decomposition and kill weed seeds.
Vermicomposting
Composting that uses red wiggler worms in a contained bin to break down food scraps quickly. It works indoors and produces a highly fertile castings-based amendment.
Carbon-to-nitrogen ratio
The proportion of carbon (browns) to nitrogen (greens) in a compost pile. A roughly 2:1 or 3:1 ratio of browns to greens by volume supports efficient decomposition.
Choosing Your Composting Method
There is no single right way to compost. Your space, time, and the volume of material you generate should guide your choice.
- Open pile: The simplest approach - pile yard waste and kitchen scraps directly on the ground in a corner of the yard. Low effort, but decomposition is slow.
- Bin composting: An enclosed bin (wood, wire mesh, or recycled plastic) keeps the pile tidy, retains heat, and deters some pests. Good for smaller yards.
- Tumbler: A sealed drum mounted on a frame that you spin. Faster decomposition and very pest-resistant, though capacity is limited.
- Vermicomposting: Uses red wiggler worms in a contained bin to process food scraps quickly. Works indoors and is well suited to apartments or homes with minimal yard space.
Whatever method you choose, place your bin or pile on bare soil rather than concrete so beneficial organisms can migrate in from the ground.
What to Add - and What to Avoid
A compost pile thrives on a mix of two categories of material:
- Browns (carbon-rich)
- Dried leaves, cardboard torn into small pieces, straw, wood chips, paper bags, and paper towels. Browns provide the carbon that fuels decomposition and prevent the pile from getting slimy and smelly.
- Greens (nitrogen-rich)
- Vegetable and fruit scraps, coffee grounds and filters, tea bags (remove staples), fresh grass clippings, and plant trimmings. Greens supply the nitrogen that feeds the microbes doing the work.
A rough guideline is to aim for about two to three parts browns for every one part greens by volume. If your pile smells like ammonia, add more browns. If it is dry and not breaking down, add more greens and a little water.
Materials to Keep Out of the Pile
Meat, fish, bones, dairy products, and oily or greasy foods can attract pests and create foul odors in a standard backyard compost pile. Also avoid pet waste, diseased plants, and anything treated with persistent pesticides, as these can introduce pathogens or chemicals you do not want in soil that contacts food plants.
Unlike organic mulch, which sits on the soil surface, compost is worked into the soil or used as a top dressing - a distinction worth keeping in mind if you are also considering ground cover options. Our article on mulch types and their trade-offs covers how the two materials complement each other in a garden bed.
Maintaining Your Compost Pile
Once your pile is established, three factors keep it working efficiently:
- Moisture: The pile should feel about as damp as a wrung-out sponge. In dry weather, water it lightly. In heavy rain, cover it or add extra browns to absorb excess moisture.
- Airflow: Oxygen is essential for the microbes that break down organic matter. Turn the pile with a pitchfork or shovel every one to two weeks to introduce fresh air and mix materials. More frequent turning speeds decomposition.
- Size: A pile smaller than about 3 feet in each dimension may not generate enough internal heat to decompose efficiently. If your pile is small, focus on layering and keeping it moist rather than expecting rapid results.
You do not need to turn the pile if you are not in a hurry - the cold composting approach simply takes longer, often six months to a year.
Keep a Small Bin in the Kitchen
A lidded countertop container makes it easy to collect fruit peels, vegetable trimmings, and coffee grounds throughout the day without multiple trips outside. Empty it into your outdoor pile every one to two days to prevent odors from building up indoors.
How to Know When Compost Is Ready
Finished compost passes a simple set of sensory checks:
- Appearance: Dark brown to black, uniform, and crumbly - like rich potting soil.
- Smell: Earthy and pleasant, similar to forest floor. No ammonia, no rotting odor.
- Texture: No recognizable food scraps or leaves. The original materials are no longer identifiable.
If parts of the pile look finished but other sections still contain recognizable scraps, screen the finished material through a wire mesh and return the coarser pieces to the pile for another cycle. The unfinished material will continue breaking down while you use the ready compost right away.
Putting Finished Compost to Work
Finished compost is versatile. Here are the most common ways to use it:
- Garden bed amendment: Work 2-3 inches of compost into the top 6-8 inches of soil before planting. It is especially effective when preparing raised beds or new in-ground planting areas.
- Top dressing: Spread a half-inch layer around established plants and gently rake it in. This feeds the soil without disturbing roots.
- Lawn booster: Spread a thin layer of finished compost over your lawn in spring to improve soil health beneath the turf. For more seasonal lawn strategies, see our spring lawn readiness walkthrough.
- Potting mix amendment: Blend compost with potting soil at roughly a 1:3 ratio to boost nutrients in container gardens.
Compost does not replace all fertilizers in every situation, but used consistently, it builds soil biology over time in ways that synthetic inputs alone generally do not. Starting a compost system is one of the lowest-cost, highest-return habits a home gardener can adopt - and the only investment required is a little patience and a pile of what you would otherwise throw away.